Workflow processing

Workflow processing allows you to perform certain actions such as sending mails, generating PDF files or making custom HTTP requests to external web services, depending on the current state of the form. When a form has been submitted, it takes on the system state Received automatically. State transitions are possible either by certain actions, or they can be performed by users in the inbox.
Workflow processing
When the user submits a form, a new form record will be created. Initially, it will start in the special system state Received. Additional states and custom actions can be added in this menu. A state transition may be triggered either by the system or manually by a user. Furthermore, a state transition can also be triggered after the forms has been idle for a certain amount of time by setting up a timed state transition.
For each state, actions can be added that should get executed when the forms assumes that state. This can be used to generate PDF files or send mails automatically. All actions of a state are processed one after another, from top to bottom in the order they are shown in the tree view.
Tree view
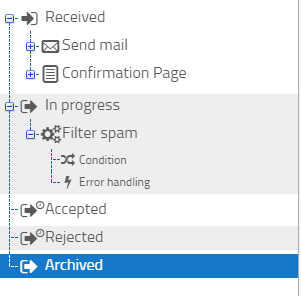
All states are shown as a list. By clicking on the name of a state, its details will be shown to the right and may be modified. Click the save button after modifying a state or your modifications will not be saved.
Similar to file explorers, you can expand or collapse a state by clicking on the plus or minus icon to the left of a state. When expanded, a list of all actions that have been added for this state will be shown.
By clicking on the plus or minus icon to the left of an action, the settings for action conditions and error handling will show up.